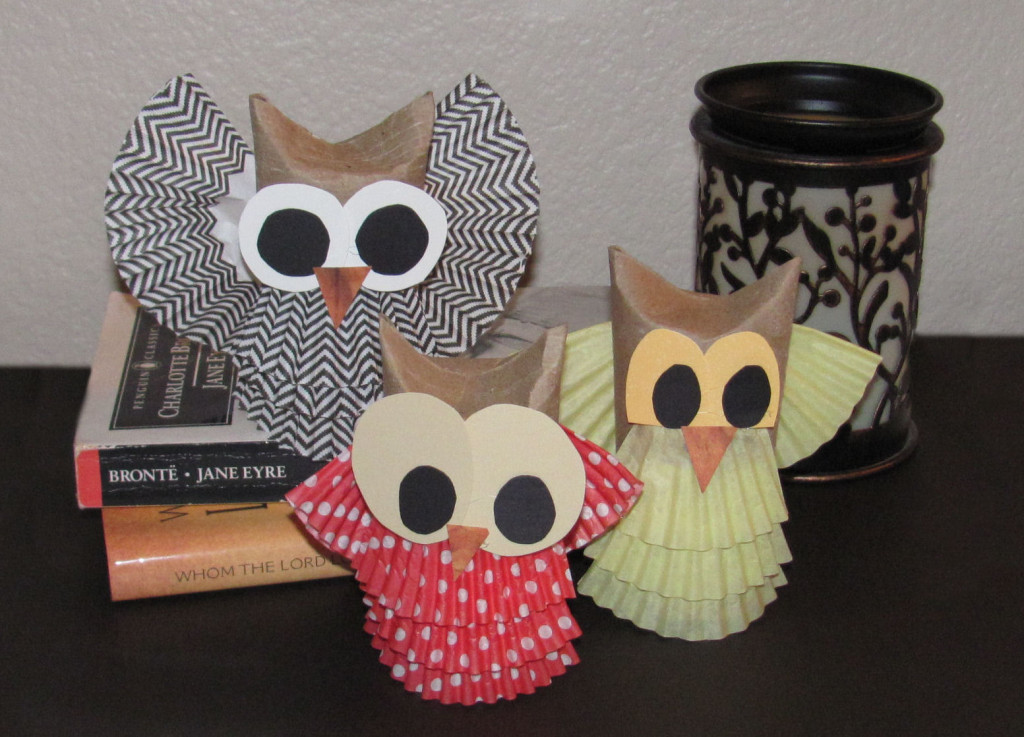
Make you own Baby Owl craft in no time with this simple Fall tutorial!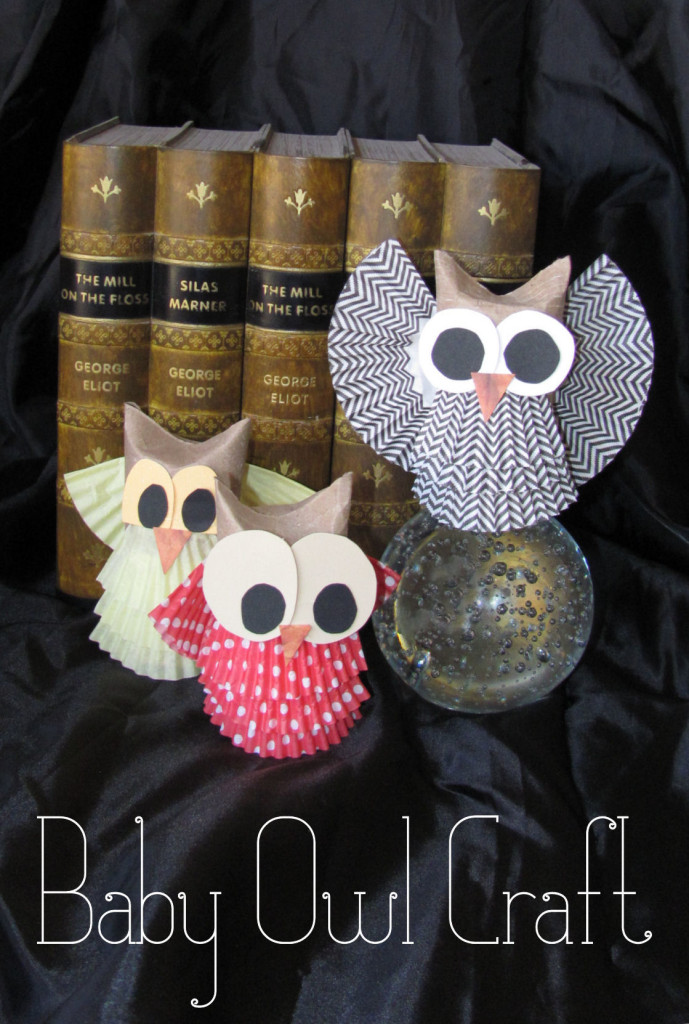
Let me start out be saying how excited I am for this time of year.
Autumn has always been my favorite! I love the weather, the clothes, the food {especially anything pumpkin!}.
While I was out and about last weekend I saw an owl sitting on a fence. I’ve lived here for 6 years and that was a first. So, naturally, I had to Google it! There are actually several kinds of owls that make their home in Arizona {find a great list of indigenous species here}.
Here’s an easy way to bring a whole parliament of these amazing creatures into your Fall décor with this simple Baby Owl Craft.
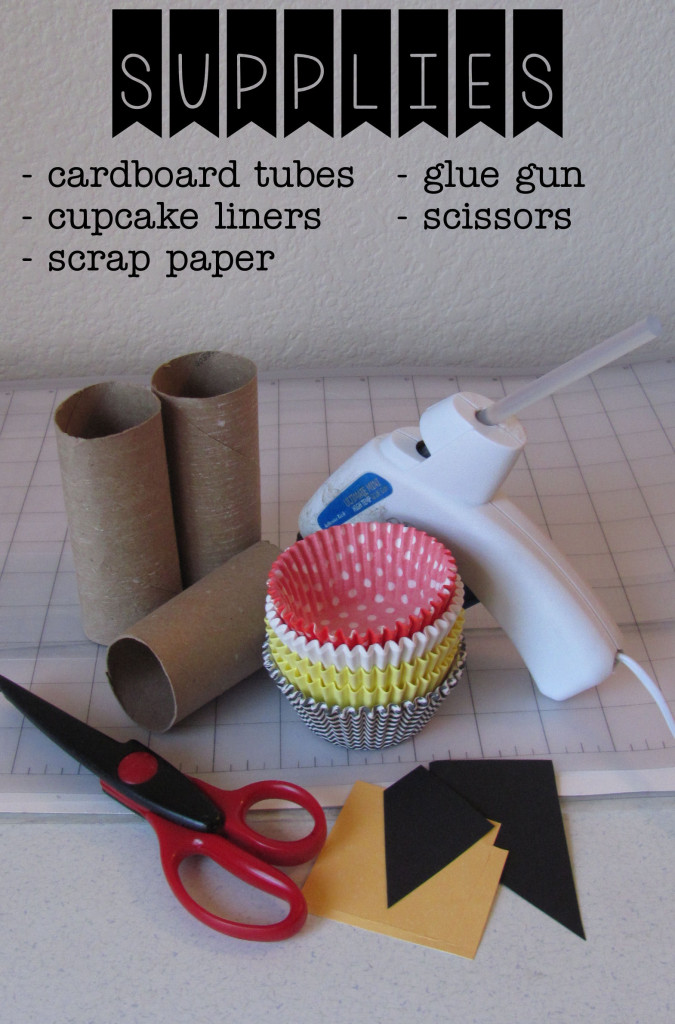
Here’s a list of supplies you’ll need, most of which are probably in your house right now!
– cardboard tubes (empty toilet paper rolls to be exact)
– cupcake liners (just 2 per owl). Wilton has some fresh and unique designs!
– scrap paper (not much; just enough for the eyes and beak)
– scissors (again for the eyes and beak)
– a hot glue gun (good old Elmer’s glue works too, just not as quickly)
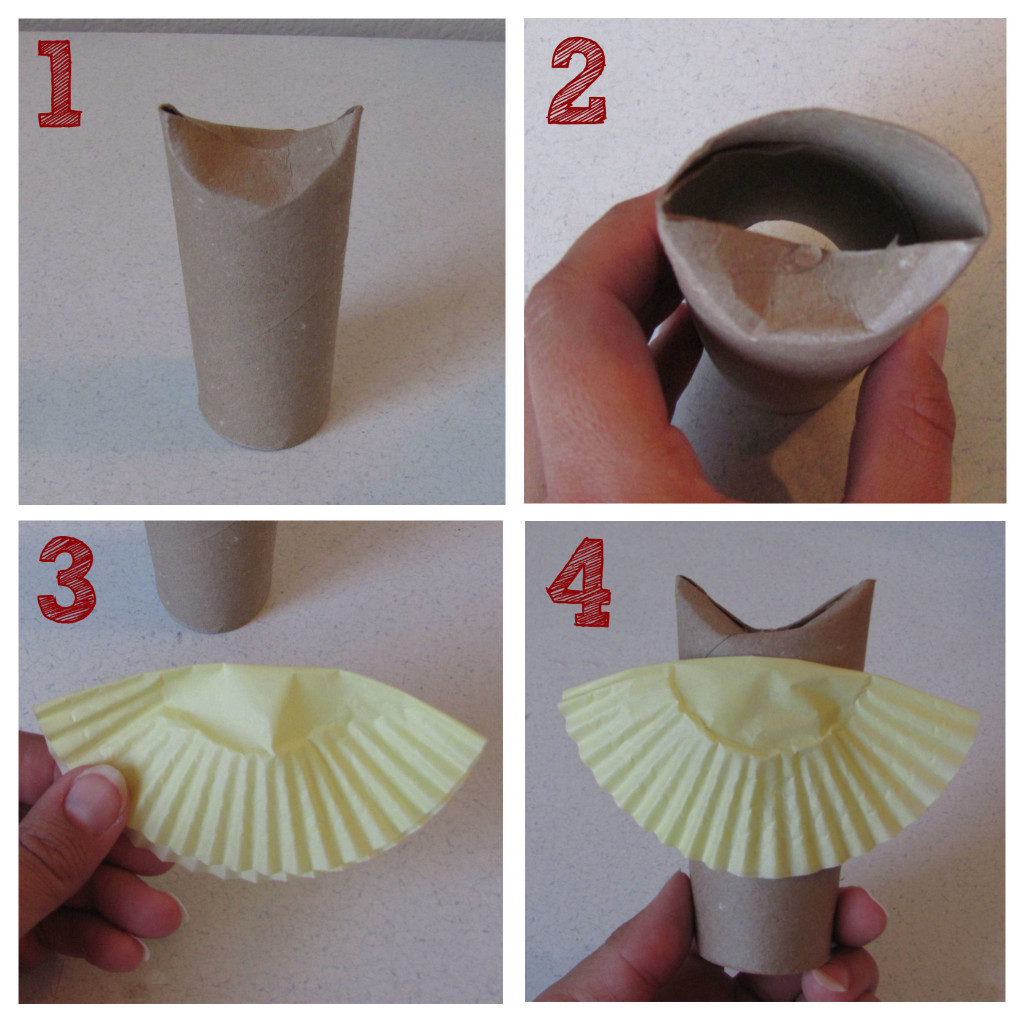
1- Start by folding in the top of the tube.
2- Add a drop of glue to one side to keep your fold in place.
3- Fold 1 cupcake liner in half.
4- Glue it to the back of the tube to create the wings.
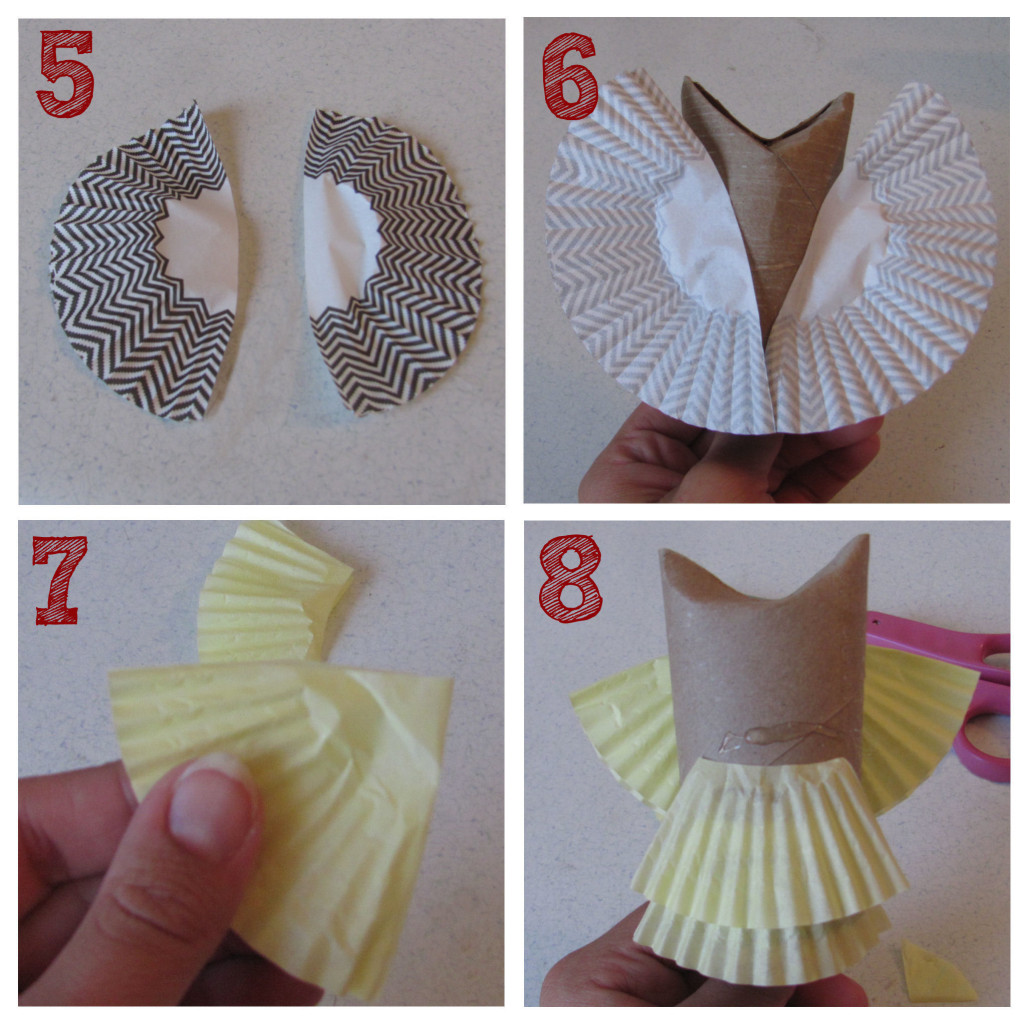
5- For outstretched wings, cut a cupcake liner in half.
6- Glue each half on the back of the tube at a slight angle.
7- Cut another cupcake liner into thirds. Trim off the flat base so only the ruffles remain.
8- Glue each ruffle, starting at the bottom of the tube, to cover the tube with “feathers”. Add eyes and a beak and Viola!
These little cuties will add a touch of autumn to your home.
Happy Fall, y’all!
